FINALLY!!!!!!!!!!!! As, all of you know I went to take the Secret Shaker Doll Necklace Class from Diana Frey
http://dianafrey.blogspot.com/& I was
VERY NEW to jewelry design. This is something I have dreamed about doing but, had never tried. I did not finish my necklace in class (only one person did) & have worked on it at home MANY NIGHTS while watching TV (thus the need for the work station in the den). I finished it last week. Wore it
ONE DAY & tore some of it apart.

Here is the detail of the original shaker. I had used head pins & was afraid that one yank while wearing it & some of the head pins could pull out or break. I had too many things that were special to me on this necklace. The KEY from Pat
http://mytatteredelegance.blogspot.com/ , the MERMAID CHARM from Lu Lu
http://coastalsistersnews.blogspot.com/ , chains from my friends met in class (Diana Salvucci & Susan Hunt), along with other beautiful things I had picked up here & there.

Here is the finished necklace the first time. See the large oval piece at the top. Loved the old clip & used it for a clasp but, it was too large & made the entire necklace out of balance when I wore it. This piece needed to be used in a different way on a different piece. So....
OFF it came & the search was on for something different to achieve a better balance.

You can see the clip a bit better here. Also, that black stone is beautiful with flecks of
blue metallic that just glisten when the light hits it.

Here you can see the sterling silver salt spoon that I used to add interest to this piece. I had found it in an Antique store in Dallas & wanted to include it. Drilling the holes in it was interesting!
Tools I have never used before & am still leery about. Diana says she was the same way & this will pass.

Here is the finished necklace on my mannequin after it was redone.

A little closer shot. Also, you can see the earrings I made to go with the necklace. Sorry the
pink pin sticks out so much. I didn't think about that when I was doing the photos. Next time I will try to be more aware.

The new clip that I used had rhinestones in it & was round not oval. Also, not as large in scale.

Some links of silver were used to make the clasp since the rhinestone was wired on. I used a
Blue/Grey Pearl,
Natural Pearl, &
Black beads to bring out the colors of the doll. Her hair being black & her eyes being blue.

Here is the close up of the redone Shaker. If you look closely at the items they are wired with a coil wrap instead of the looser head pins. I feel much more secure now. I hope you enjoy seeing my first attempt at jewelry design. I LOVED THIS! And can't wait to do some more designs. Diana has come up with another class that I hope to take in July.

 Does that sentence cause you to have magical thoughts? It does me. And if you follow that thought & this link http://onceinabluemooniris.blogspot.com/ you will indeed find yourself in a place that must surely be Heaven on Earth!
[1].jpg) This is just at few of Jain's http://onceinabluemooniris.blogspot.com/ amazing iris! She gave me permission to share a few photos.
This is just at few of Jain's http://onceinabluemooniris.blogspot.com/ amazing iris! She gave me permission to share a few photos.  This week I became the owner of some of these beauties. I was sitting at the computer drooling over her beautiful Blog & then I saw that she was offering some of these for sale. THRILLED was I. They arrived yesterday & I can't wait to get them in the ground & start dreaming of next springs blooms.
[1].jpg) It seems as if this little angel is urging you to visit Jain & see if this Blog & these flowers will speak to your soul as it did mine.
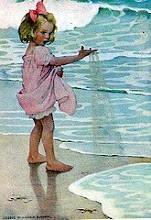
It seems as if this little angel is urging you to visit Jain & see if this Blog & these flowers will speak to your soul as it did mine.[1].jpg) Do you think she has a few?
Do you think she has a few?[1].jpg) Can you imagine the time & effort she puts into these gardens? WOW!
Can you imagine the time & effort she puts into these gardens? WOW!